Showing posts with label tutorial. Show all posts

Saturday, May 3, 2014

Reine Doll Shop's (I AM A QUEEN) IBB Make Up Challenge ~ Snow Queen

hello guys..!! this is my first time joining a make up challenge and i hope i nailed it.. hehe.. this make up challenge is host by Reine Doll Shop and please like their facebook page too Reine Doll Shop Page ..


so this is my version of Queen, i have this beautiful handmade white jeweled crown made by my sister.. my idea is from Snow Queen but instead using all white makeup, i choose smokey eyes with nude lip color.. i love white queen because she has that grace, elegance, quiet but dangerous, and also soo beautiful.. she is cold as ice but who knows what's inside her heart?? is there any love? warm? no one will ever know.. she intrigued our curiosity and that's why i love her..!! you will probably notice that snow queen is actually Queen Elsa from Frozen.. i really fall in love with Elsa and finally got me to this tutorial, a completely different look or as i can say a mature look from Elsa.. i love Frozen and will always be..!!<3

i try to implement my vision of snow queen, my creation is a snow queen doesn't have to be blonde or white hair, a dark or brown hair also suitable for this look.. so enjoy and i have the tutorial too..!! hope you like it..!! thanks..~~

full look
how to create this look :

first apply, base or face primer on whole face, i'm using Lancome maquibase shine control .. then cover the area of the face that has enlarged pores, i'm using Maybelline baby skin pore eraser..

face primer
pore eraser
continue next with foundation, i'm using L'oreal le teint true match #R2 apricot ivory, it's a liquid foundation and the consistency is watery so i apply the foundation using stippling brush Sigma F50.. stippling brush is perfect when applying liquid foundation, it will give a smooth and even results also an airbrush look finish..

foundation
then as usual, apply the concealer to cover darker area on your face.. if you have red acne, u can use a corrector, in here i'm using Body Shop tea tree corrector.. and top it off with concealer, i'm using L'oreal La touche magique perfect match..

corrector for red acne

concealer for darker area
then blend it out with small angled brush, i'm using Sigma P84..

Sigma P84

after that, powder your face to reduce shine and oil.. i'm using Kana Pate Shokunin pore putty BB mineral powder apply it with big brush..

powder
now for the eyes, first apply the eyeshadow primer on the whole eye lid.. i'm using my favourite product, Urban Decay eyeshadow primer potion.. 

eyeshadow primer
for the eyeshadow, apply silver color on the whole lid.. then black color on the outer corner and create a cat eye shape.. for the black color intensity, build up a little by little until u find the right intensity for u.. i like mine to be bold.. after that remember to blend it out with the silver color to create a smooth transition.. in here i'm using my Life Palette : Night Life from Em Cosmetics.. actually i buy this palette from Reine doll Shop too..!! my first Em cosmetics and i'm so thrilled with this product..!!!

life palette : Night life from Em Cosmetics
my favourite product..!!
silver color
eyeshadow
after that, for the lower part of the eye, use black eyeshadow and draw on the waterline until inner corner of the eye.. and put a little silver eyeshadow only at the inner corner to spark your eyes a little..

draw on the waterline
and don't forget to put a white or light eyeshadow on the brow bone for highlight..

highlight on the browbone
next is applying the eyeliner, i'm using K-palette liquid eyeliner..

eyeliner
next is the eyebrow, i'm using eyebrow pencil first from Viva in brown color, then top it off with browcara from Dolly wink #2..

eyebrow
next is fake eyelashes..!! i'm using ginza decolog rich eyelashes..


continue next with shading, i'm using candy doll shading powder.. put it on the nose bridge and hollow of the cheek..


and finish this look with pink blush on and nude pink lipstick, i'm sorry i don't have any picture of it because the photos are gone..!! i don't know what happened with my phone..=(
but i will tell u what products did i use, for blusher i'm using maybelline cheek glow peachy sweetie and candy doll blusher in light pink color.. for lipstick i'm using maybelline born with it #015..

and DONE..!! more selfie coming through...~~


hope u guys like this look and thx for reading my blog, see u in my next post and good luck..!!~~

Thursday, April 3, 2014

~korean ombre/gradient lips tutorial..~

hello girls..!!~~ this is my first post in April, yay..!! today i want to share about how to make a korean ombre/gradient lips.. this is a request from Miss Inggrid, and i try to make this tutorial as good as i can.. hope u like it Inggrid..!! =)

in this tutorial, i don't use any lips concealer and lips tint because i don't have one.. i'm not that type of girl who really into lipstick or lips color whatsoever, i don't like to wear it to be honest.. haha.. so forgive me, i'm using anything that i have to create this look, which are foundation, lipstick, and lipgloss.. so enjoy this tutorial..~


ok first, i'm applying my lip balm because my lips are dry easily and for some reason not friendly with either lipstick or lipgloss therefore the lip balm become a protective layer for my lips.. i'm using nivea essential care..


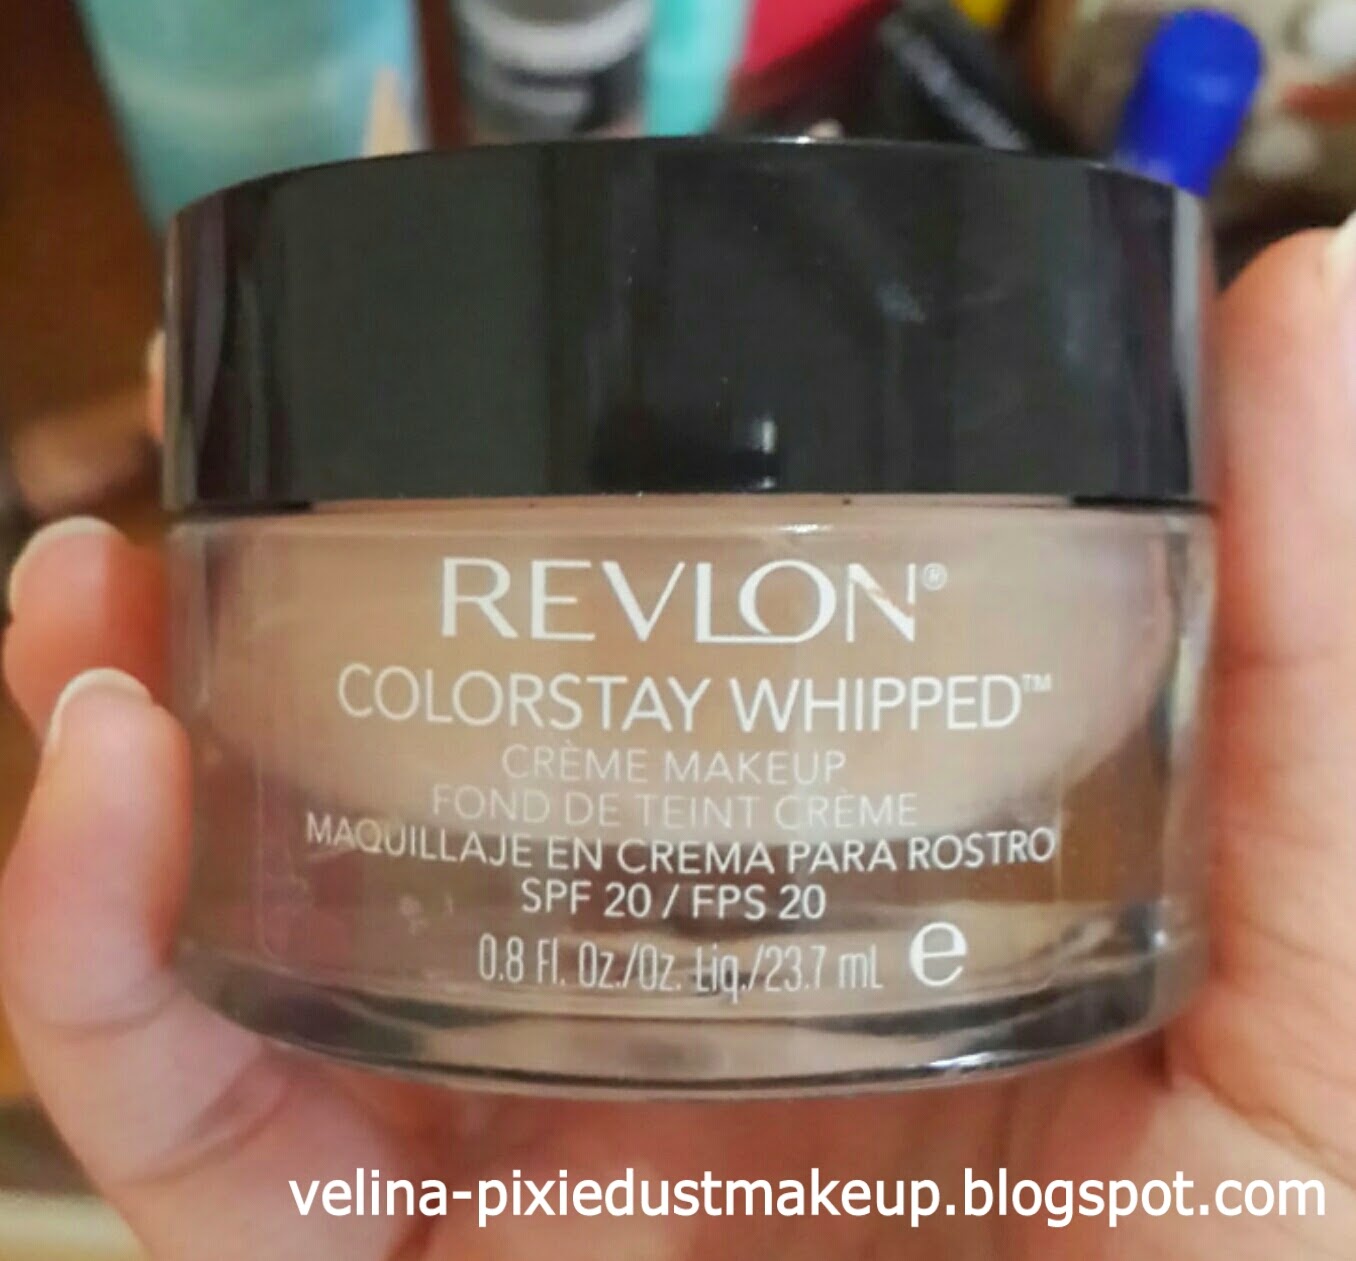
and then in exchange for lips concealer, i'm using foundation instead.. i know i will never use a lips concealer that's why i never buy one, for me foundation is a great tool to covering everything..!! i'm using revlon colorstay whipped cream foundation.. apply it on whole lips, upper and lower..


after applying the foundation


next step is color the middle part of the lips, i know that i supposed to use a lip tint and as u know i don't have one that because lip tint has a drying effect on lips, so not buying it either.. i'm using lipstick instead, mixing 3 colors.. first one is from NYX luscious lip gloss pallet #06 Pinky promise, i use number 3 and 5 altogether.. then i put another layer of color from revlon colorstay ultimate suede #095 Finale.. you might feel that the revlon one is too red, but when u wear/apply it the color isn't bold, it's soft and if you see my pic, the color is almost look like pink color, perfect for this look..

mixing number 3 and 5
adding this color

applying NYX number 3 & 5

applying revlon

color it only in the middle area
then, blend the color to the outer side.. if bottom area, blend it downward and if upper area, blend it upward.. and remember you have to clean the lip brush first using tissue..!!


bottom part, blend downward


upper part, blend upward
and the last step is applying lipgloss..!! it will create a more natural look.. make sure u wear a clear lipgloss, a little glitter is alright.. i'm using candydoll lipgloss, one of my favourite.. you can't even notice the glitter on my lips right?? hehe..


and this is the result..!! Voilaa..~~


thank you for reading my blog.. it's a short one, but i hope i explain all of it clearly.. leave a comment below if you have any questions, i will give my best answer for you guys..!! see you in my next post and good luck..!! love yaaa...<3

Saturday, March 29, 2014

Yoona SNSD baby G kiss me makeup tutorial

hello pretty ladies..!!! today i want to share an inspired makeup tutorial from Yoona SNSD baby G kiss me campaign.. it was a collaboration project but got cancelled, BUT me and other fellow bloggers who join the collaboration felt that we should post it anyway.. we have work hard to create these looks and happy to share it with all of you..!! but we can only gathers 7 ppl who we know join this collaboration, sorry if it's not a full member but we hope u guys will enjoy it..!!


this are the links of beauty bloggers who join this collaboration, don't forget to check them out..!! they are so pretty..!!

Bella Terentia as Hyoyeon
Shanty Huang as Sooyoung
Ardanella Purnamasari as Tiffany
Rani Hidayat as Seohyun
Velina Theresia as Yoona
Lintang Pratiwi as Yuri
Rere Dini as Jessica

oh btw this look is so cheerful and colorful..!! suitable for this upcoming spring season..!!! it's a pretty long tutorial because this look use a lot of colors for the eyes only and i want to explain it in photos so u guys will understand the steps and can create this look too..!! brace yourself and get ready girls..!!! =D

now i'm gonna show u guys the picture of Yoona first, then start the tutorial.. enjoy..~


and let's start with my bare face selfie..~~ i already prep my face with toner > serum > moisturizer > sun cream..


then, apply CC cream, i'm using CC cream from Em Cosmetics.. this was my first CC cream and become my favourite..!! you can see my review about this product on this link ..


after that i put on my laneige snow bb cushion for some coverage, because korean makeup is all about that natural beauty and non-heavy makeup.. so that's why i didn't use foundation for this look.. and also if you read my review about this product, you will know that it will be look oily, because they want to create a dewy look when you use it.. but since i'm not a big fan of dewy look, i will top it off with powder, stay tune..!!


and it's concealer time..!! as usual i'm using my L'oreal la touche magique perfect match concealer to conceal the dark area on my face, such as dark circles and acne scars.. i'm still hoping that they release this product here in Indonesia.. >o<


after concealing every dark spots, powder up girls..!! i'm using loose powder first (freshel bb mineral powder from kanebo) to absorb the oil and then top it off with my poreputty bb mineral powder (compact) using my beloved big brush..

duck face


^3^

now let's move to the tricky and long part, the eyes..!!! first put on the eyeshadow primer, i'm using urban decay primer potion..


oh and sorry for the bad image quality because i'm still using my phone to take every photos on this blog.. still try and figuring out how to use camera and photoshop to adjust the brightness, i'm not that good using computer programs, so forgive me for studying this long..>.<

now continue on the tutorial, after applying the eyeshadow primer, put on baby pink eyeshadow on the whole lid.. i'm using coastal scents 120 eyeshadows palette on this tutorial, so all the colors are from there..


and now the fun part..!! we will be using 4 colors which are yellow, orange, blue, and purple and by using small brush, in here i'm using an eyeliner brush E05 from sigma because we want to create a dot or small circle on the eyelids.. i will start from my left eye (left and right eyes have a different color on it), then the right one..
here are the color i choose :

yellow
blue
purple
orange
now let's start from the left eye, the first color is yellow, put/draw a dot on in the inner lid.. follow it with the blue color, remember don't make the distance too far.. then place the purple , and then blue again, but this time the blue has to be on the outer area of the eyelid.. and the last 2 colors are orange and yellow, put orange first a tiny bit above the last blue and yellow directly above the orange.. see these pictures below for a better explanation.. and that's it for the left eye..!!

left eye, yellow
left eye, blue
left eye, purple
left eye, blue
left eye, orange
left eye, yellow
now move on to the right eye, we still use the same colors as the above, so i'm only write down the steps and which colors first in order..
the first color is orange, also place it on the inner eyelid, then follow it with blue, do it from inner to outer and put the yellow, blue again, and finish it with purple which located on the outer side of the eyelid..

right eye, orange
right eye, blue
right eye, yellow
right eye, blue
right eye, purple
finally finished the eyelid area, now put on yellow on the lower lash line on both eyes.. and yes you will make another dots on the lower lash area.. >o<

yellow as the base
we will start from the lower left eye, after applying yellow color as the base, put on a dot of blue color on the outer side, moving inward around middle of the eyes put a dot of orange color, and another orange color around the inner area, not far from the middle one.. see the images below for further explanation..~

left eye, blue
left eye, orange
left eye, orange
now move on the the right eye, this time i decided to start from inner to outer.. put the orange color first on the inner, and because the outer side color also orange, i put the outer first and then put the last color which is blue in the middle..

right eye, orange
right eye, orange
right eye, blue
wow finally it's done..!!! now put on the eyeliner.. i'm using K-palette liquid eyeliner..


move on to the eyebrows, because it's a korean look, i will draw my eyebrows a lil bit straight and thicker than usual.. and finish them off with browcara from dollywink..


then it's eyelashes time..!! i have very short eyelash, that's why i'm gonna use fake eyelashes but i choose the most natural look.. i'm using local brand from Andiyanto, this is my favourite eyelashes, because it's light and felt like my real lashes..!!


then, i top the fake eyelashes and my lower lashes with mascara..


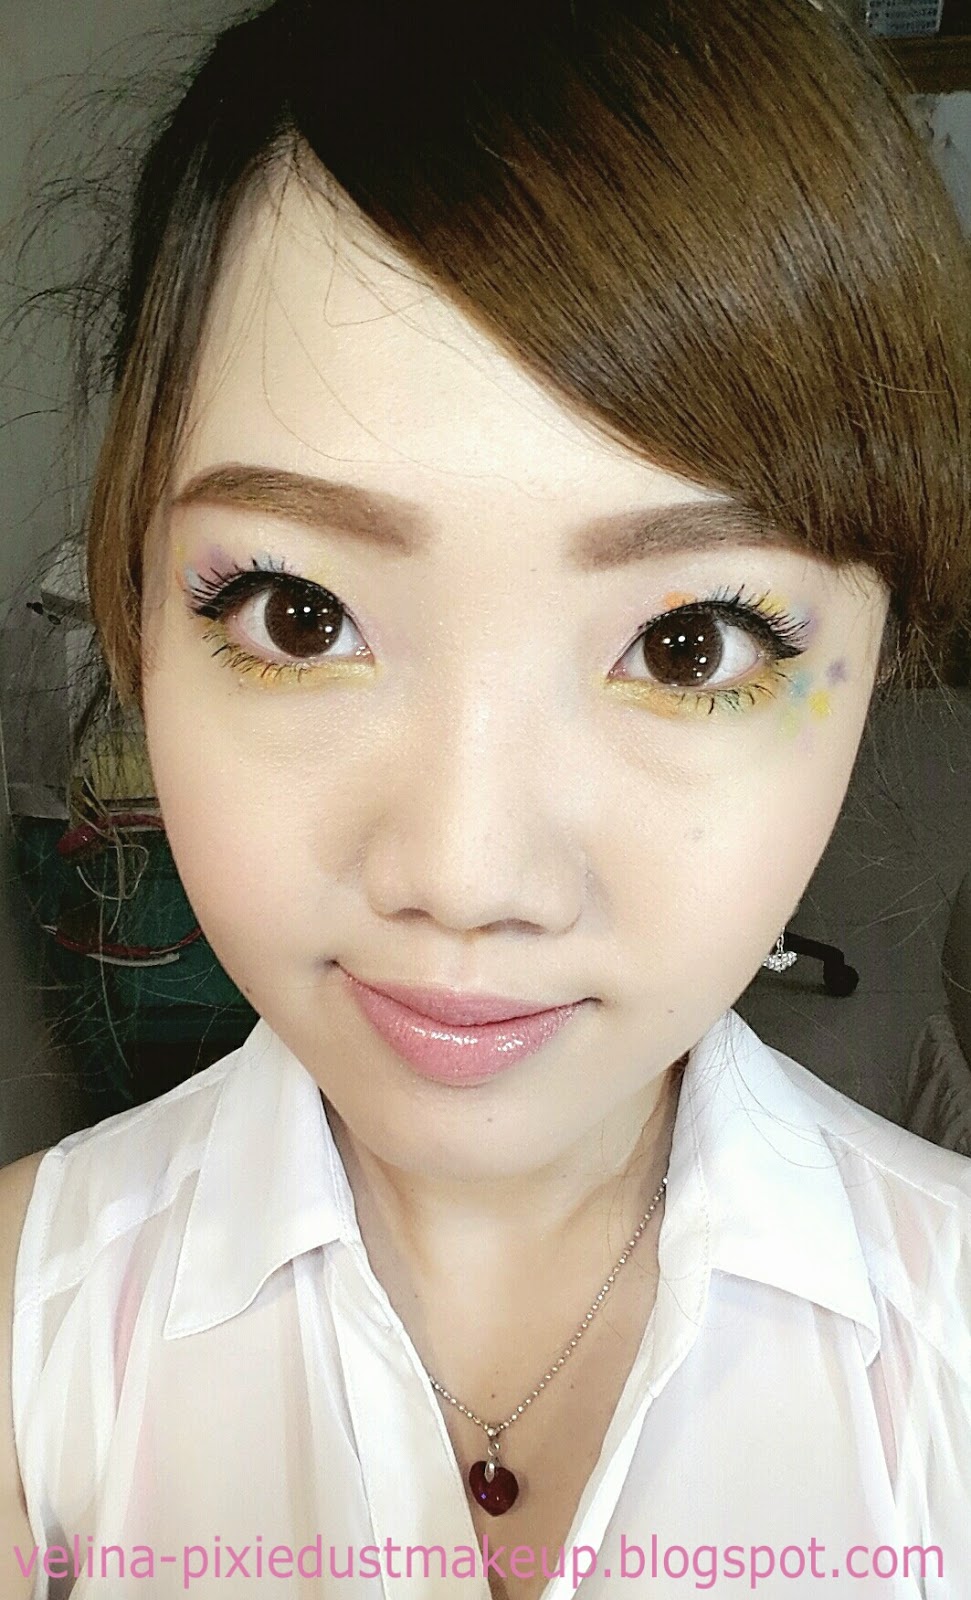
and to complete the look, draw 5 stars below the right eyes.. i will draw them with NYX jumbo pencil in cottage cheese color using small eyeliner brush.. then put some colors by using the eyeshadow, i use pink, blue, and yellow to color them..


and 3 final steps are put on the pink blusher, use soft pink lipstick, and lipgloss..


and you are finish..!! here's the final look..


i'm sorry to make such a long post.. but i hope u guys enjoy it and thx for reading my blog..!!! good luck and see you in my next post..!!